How to Create a new User Account on Windows 11
How to create a new user account on Windows 11 is an essential step if you share your computer with others. In this tutorial, we’ll guide you through the process of creating a second user account on your computer.
Why create a new user account on your Windows 11 PC? Imagine that you share your computer with a family member or a colleague. A second account allows each person to have their own workspace, with personalized settings and files, while keeping your personal information separate and secure.
This also helps keep private information confidential and avoids accidental changes to your data or settings.
Step 1: Open Settings
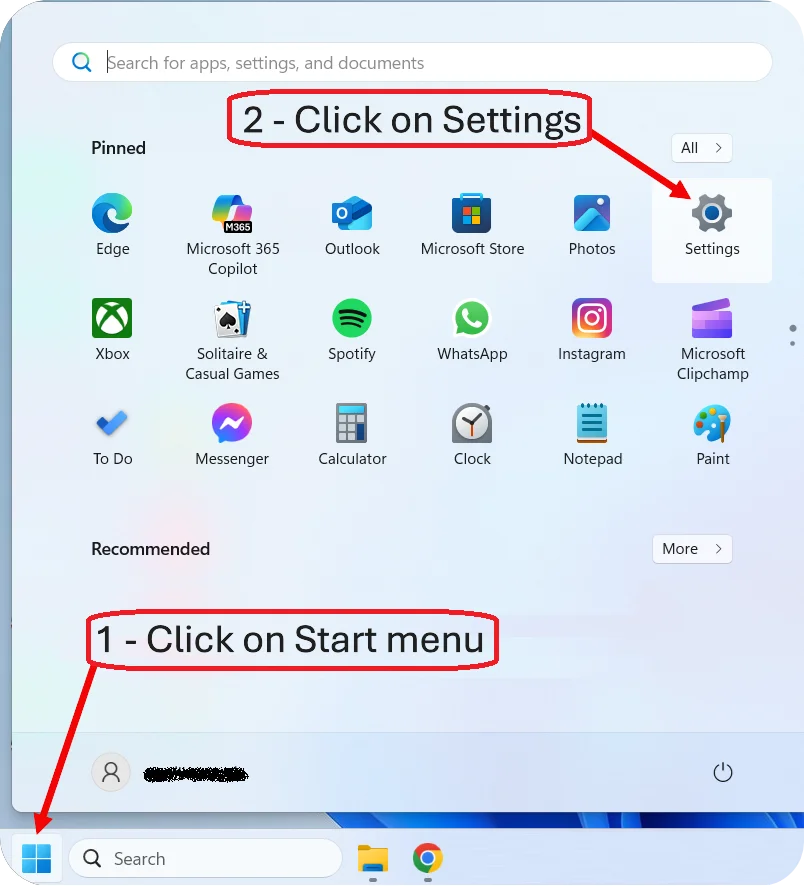
1 – Start by clicking on the Start menu, which is represented by The Windows logo located at the bottom of the Taskbar.
2 – Once the Start menu is open, click on the gear icon to access Settings.
💡 Tip: You can also open the Settings by using the shortcut Windows + I. You need to press the Windows key and, without releasing it, press the I key.
Here’s what the Windows key looks like 🪟
Step 2: Open Accounts
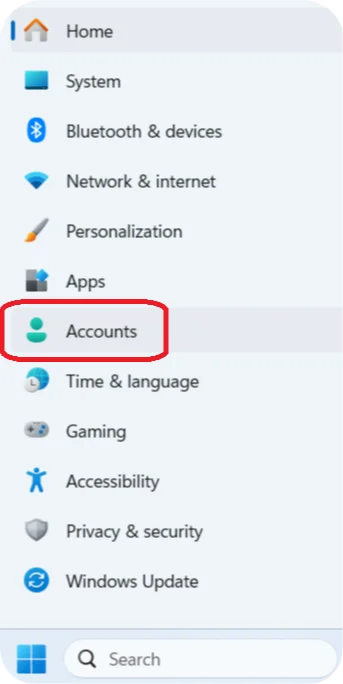
Once you have opened the Settings, you need to click on Accounts to proceed with creating our new user.
Step 3: Other users
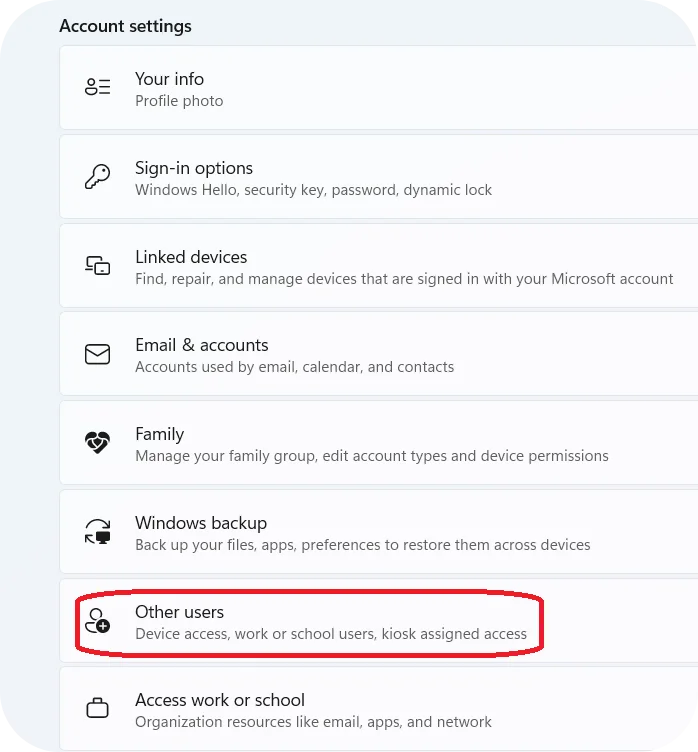
You are now on the Accounts page. To find Other users, you need to scroll down.
Scrolling means moving the content of the page up or down using your mouse’s scroll wheel or by dragging the scroll bar on the side of the window.
Keep scrolling until you see the Other users section, then click on it.
Step 4: Add a New User
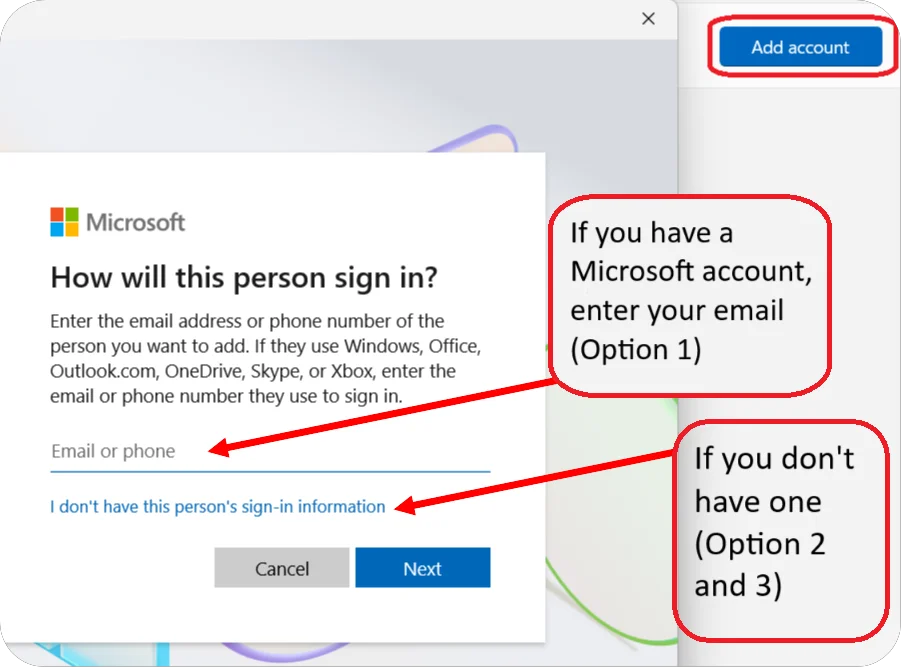
Click on Add account, a Microsoft account window appears.
Here, you have three options to create a new user account:
– Option 1: Adding a Microsoft Account
– Option 2: Creating a Microsoft Account with an Existing Email
– Option 3: Creating a Local Account
We should look more closely at these three options before deciding.
Step 5: Make your choice and finalize your account!
➤ Option 1: Adding a Microsoft Account
If the person you are adding already has a Microsoft account:
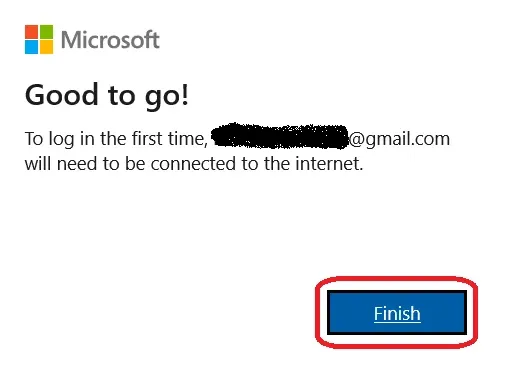
Enter their email address associated with the Microsoft account. Click on Next. Congratulations, your account is created! You can click on Finish.
👉 Consequences: This allows the user to sync their settings, preferences, and files across multiple devices using OneDrive and other Microsoft services. It also provides access to the Microsoft Store and other Microsoft services.
➤ Option 2: Creating a Microsoft Account with an Existing Email
If the person does not have a Microsoft account but has an email address:
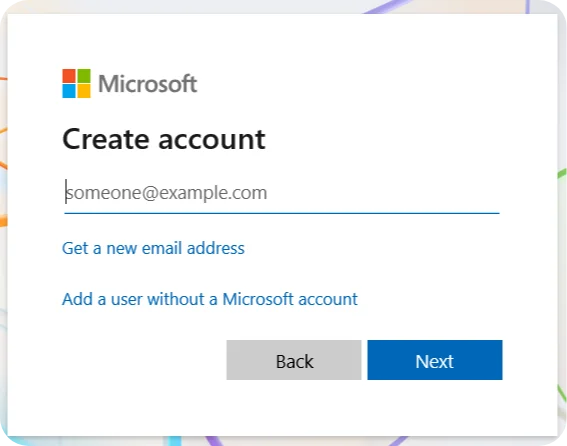
After selecting the option I don’t have this person’s sign-in information, Enter their most frequently used email address and click on Next.
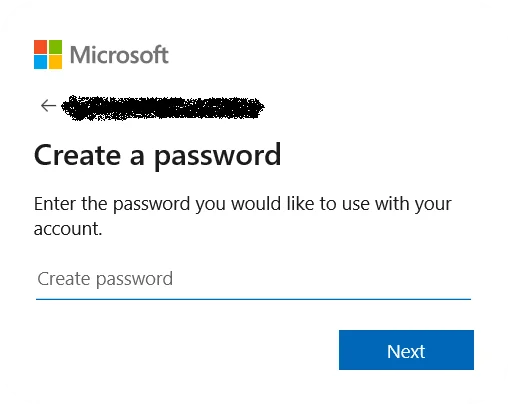
You now need to create your Windows account. Follow these steps:
create a strong password.
If you need help, you can check the tutorial How to Create a Strong Password,
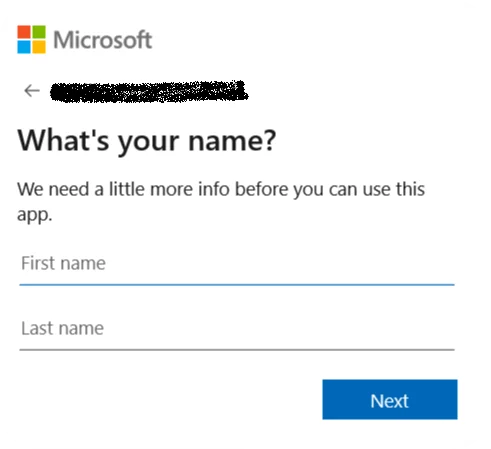
Enter your first name and last name.
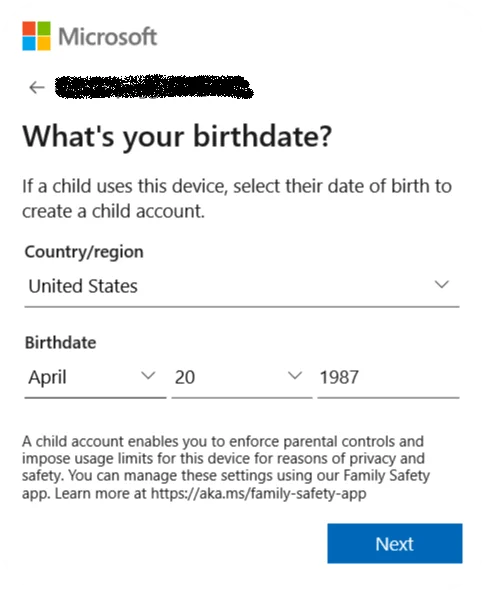
- Enter your country and your date of birth.
- Microsoft will send you an email with a verification code.
Go to your email inbox, find the code, and type it in.
If you do not want to receive advertisements, remember to uncheck the box.

👉 Consequences: This will create a Microsoft account linked to their email, allowing them to use Microsoft services and sync data across devices.
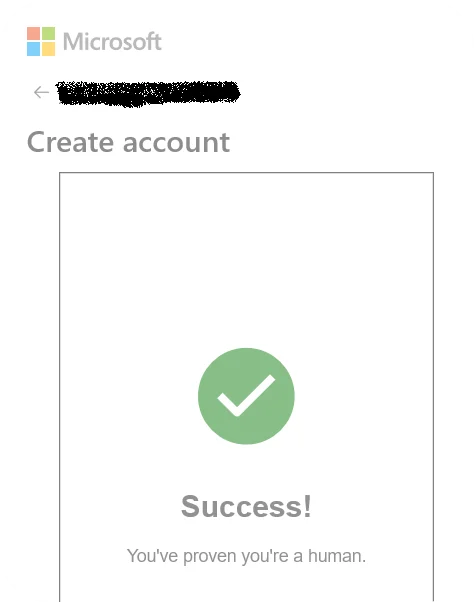
You will need to prove that you are not a robot.
To do this, click on Solve Puzzle.
You will be asked to answer a picture test.

Test passed!
Some more information :
– Enter the name you want to use for your new account.
– Create a password for your session.
This password will let you log in to your new session.
– Answer 3 security questions.
⚠️ Important: Remember the questions and your answers.
They will help you log in if you forget your password.
Click on Next, Congratulations, your account is created!

➤ Option 3: Creating a Local Account
If you want to create a local account, You don’t need an email address:
After selecting the option I don’t have this person’s sign-in information, select Add a user without a Microsoft account.
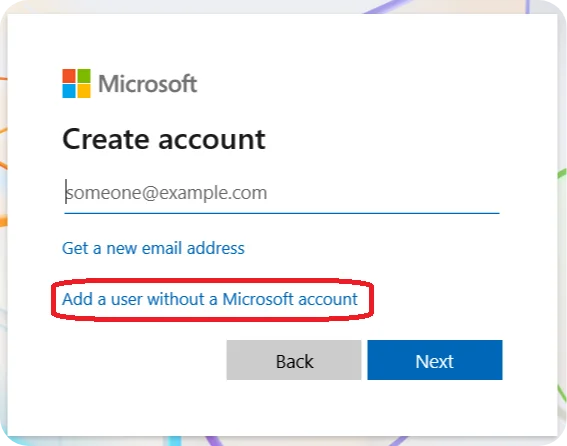
After selecting the option I don’t have this person’s sign-in information, select Add a user without a Microsoft account.
- Enter the name you want to use for your new account.
- Create a password for your session.
This password will let you log in to your new session. - Answer 3 security questions.
⚠️ Important: Remember the questions and your answers.
They will help you log in if you forget your password.
👉 Consequences: A local account is tied to the specific device and does not require an internet connection or a Microsoft account to log in. This account will not sync settings or files across devices and will not have access to Microsoft services like OneDrive.
Step 6: Log in to your new account
Now that your new account is ready, you can switch to it, let’s start by signing out :
To sign out of your current account, simply click on Sign Out.
- right-click on the Start menu.
- Click on Shut down or sign out.
- To sign out of your current account, simply click on Sign Out.

To connect to your new account, after logging out, press any key to reach the Windows 11 login screen.
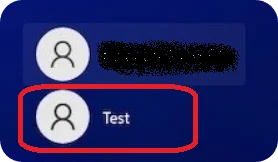
At the bottom left, you will find the accounts that exist on your computer. In the second position, you will see the account you just created; here I have named it Test.
Click on your new account, then enter the password you chose.
Windows will log you in automatically.
During this first login, it may take a few seconds as Windows sets up your user session.
Congratulations, you are now logged in with your new user. 🥳🥳🥳
Conclusion :
Setting up a second Windows account takes only a few minutes, but it can really help with organization, privacy, and productivity.
Now that your new account is ready, you can personalize it the way you like, with your own apps, settings, and files.
Well done, and enjoy your new Windows session!
💡 Tip: Before going any further, take a moment to read the tutorial How to Managing User Accounts in Windows 11.
The account you just created is slightly different from the one you’ve been using since you first started your computer.
So it’s important to understand a few key things before using it.
You can also check out the theme How to Customizing Your Windows Account (5 tutorials) to learn how to tailor this new account to your preferences.