How to Customize a Windows Theme
How to Customize a Windows Theme is what we’re going to explore next, a slightly more advanced section, but still very beginner-friendly.We are now going to explore a slightly more advanced section: customizing your theme.
I’ll guide you through each step, so there’s no need to worry.
The explanations will be a bit less detailed than usual, as there are many customization possibilities to choose from.
You also can’t really mess anything up, and if you don’t like the changes you make, I’ll show you how to easily revert them.
⚠️ Just a quick note before we continue
While customizing (or “mastering”) a Windows 11 theme, I’ve noticed that some bugs can occasionally occur, especially when changing colors.
Don’t worry! I’ll let you know when we get to that step and explain what to do if it happens.
Step 1: Customize your theme
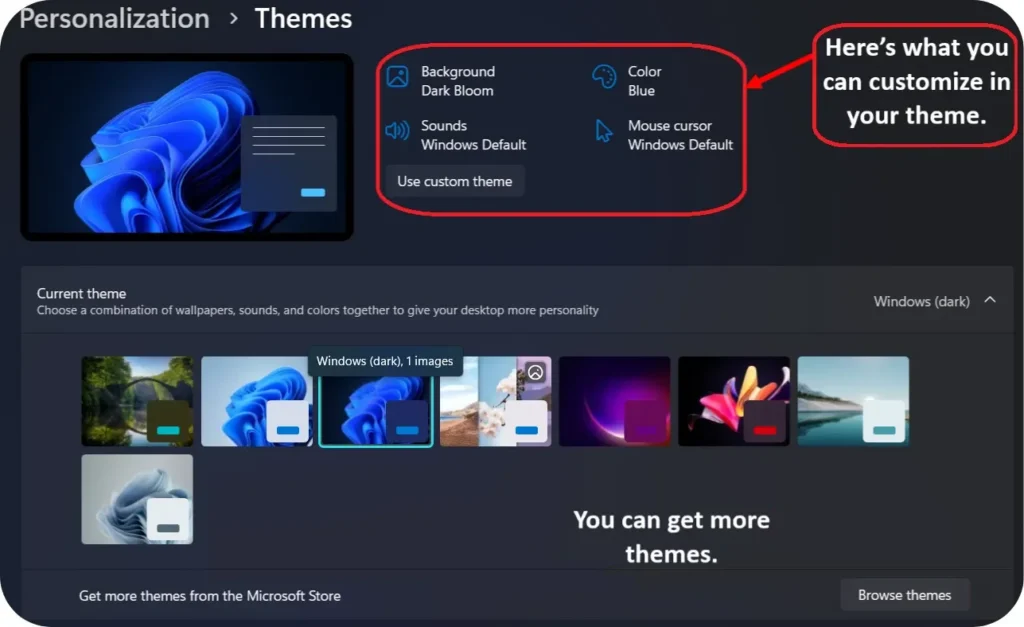
Under Personalization > Themes, you can see, on the right, the 4 elements you can customize.
To get started easily, choose a theme you already like, that way, you’ll have fewer things to change.
Now let’s get started.
If you want to change the wallpaper, click on Background.
Step 2: Choose a New Image
If you’ve already followed the Change the desktop background tutorial, this part might look familiar.
But if you’d like more details on how to change your wallpaper, feel free to check it out again.
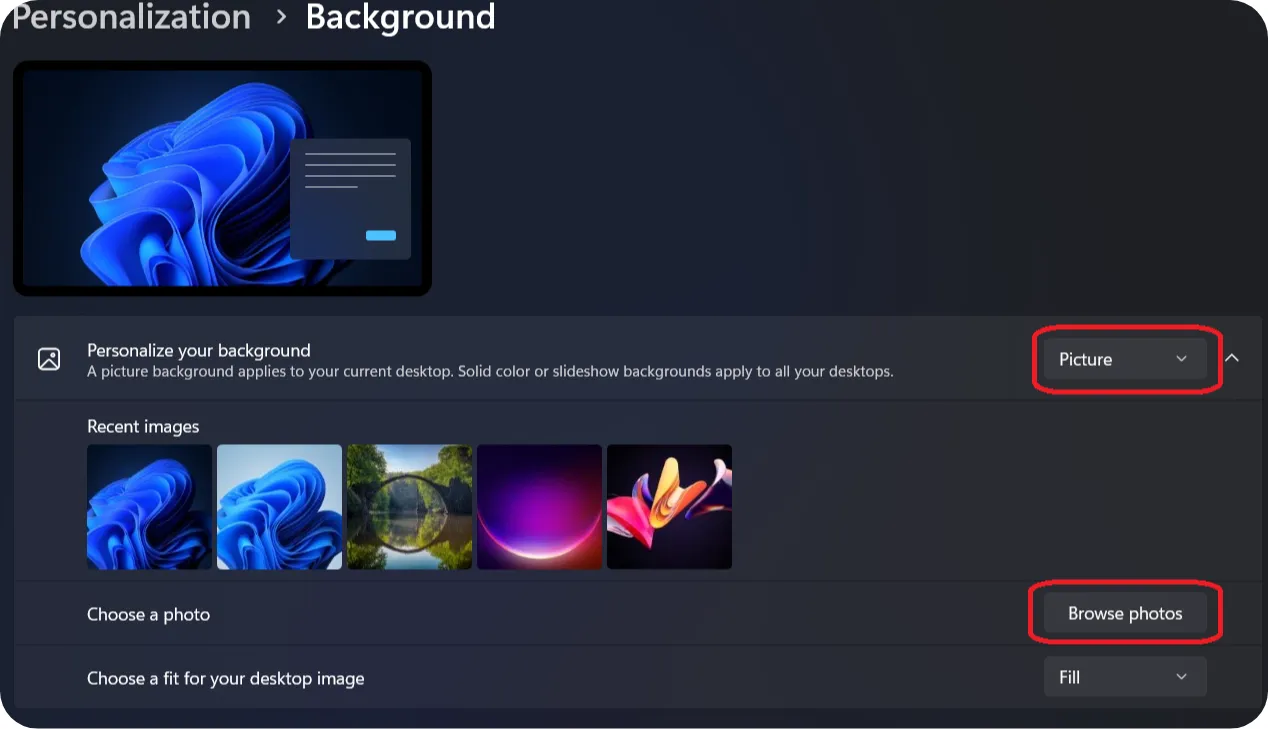
Under Personalize your background, make sure Picture is selected from the dropdown menu.
Click on one of the suggested images to apply it right away!
Or click Browse photos to choose your own image.
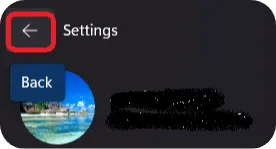
To go back to the Themes menu, you can click the arrow at the top-left corner of your screen.
Step 3: Customize the theme color
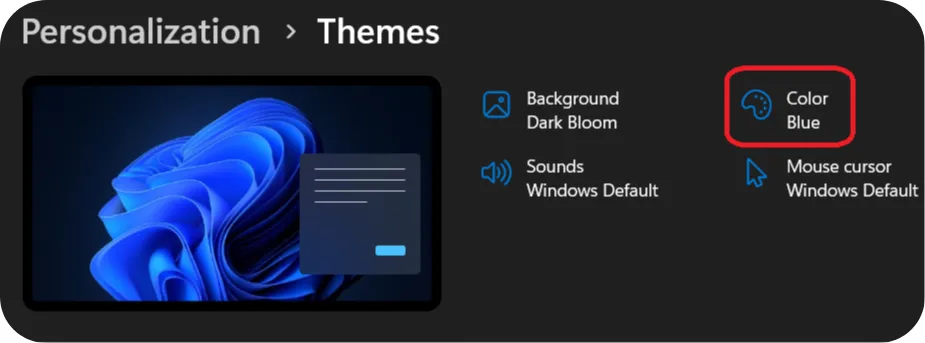
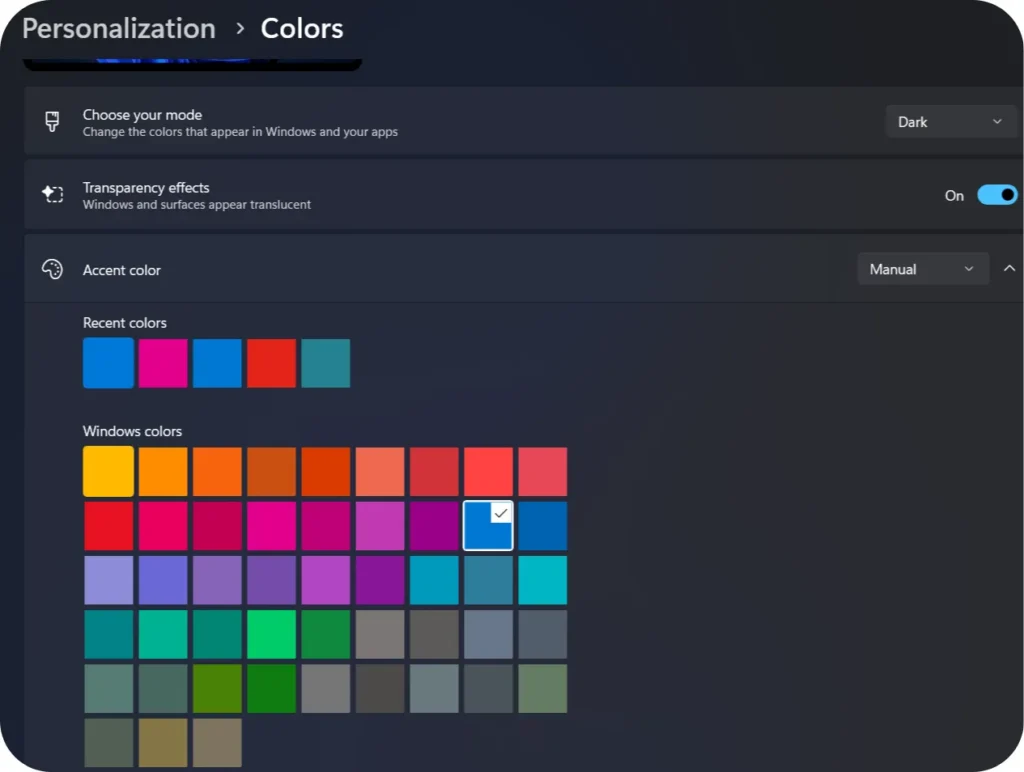
Under Personalization > Themes, We are going to customize the color. To do this, click on “Color”.
In Windows 11, customizing the theme color changes the appearance of several interface elements.
This includes the color of the Start menu, taskbar, window borders, buttons, and other visual accents throughout the system.
⚠️ his is the step where a bug might occur.
What can happen is that when you change the theme, the color doesn’t update and stays the same. In that case, you’ll need to go into this menu and change it manually.
So it’s important to take note of the default theme color, so you can reapply it if you encounter this bug.
In this menu, all you have to do is choose the color you want by clicking on it.
It will be applied immediately.
To go back to the Themes menu, you can click the arrow at the top-left corner of your screen, as we’ve already seen.
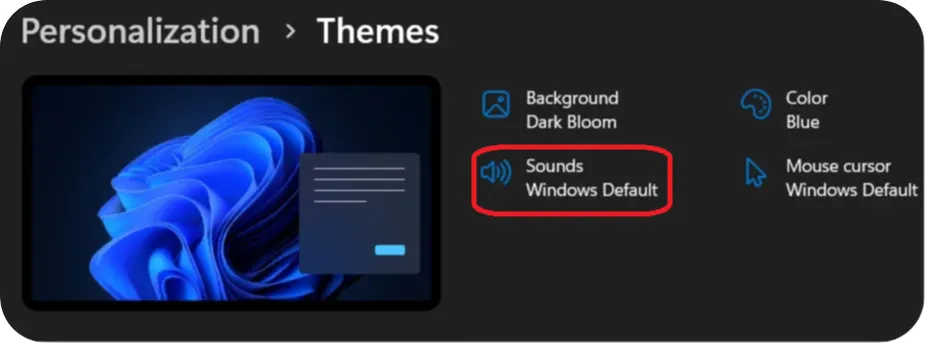
Step 4: Customize the Sounds
Under Personalization > Themes, We’re going to see how to change the different Windows sounds. To do this, click on Sounds.
In the “Sounds” section, you can customize the sound scheme of Windows.
This includes changing or disabling the sounds that play for actions like receiving notifications, emptying the Recycle Bin, starting up the system, or closing a program. You can choose from the default sounds or upload your own.
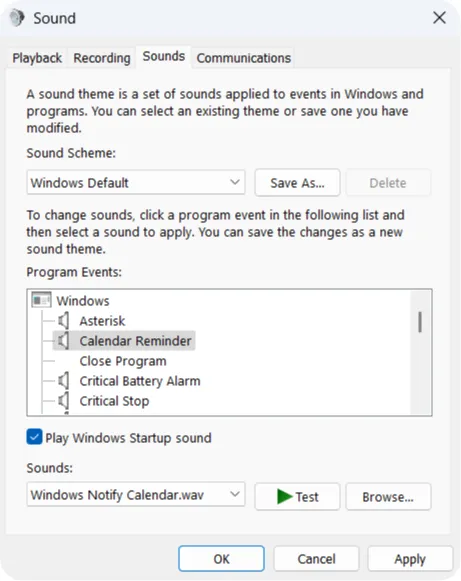
In the Sound Scheme section, you can select No Sounds to disable all Windows sounds.
If you want to change a specific sound, select the event you want to modify in the Program Events list. Only the events with a speaker icon next to them can be customized.
Then, under Sounds, click the dropdown to open the list of available sounds. To help you choose, you can select a sound and click Test to listen to it.
Once a sound has been modified, the event will be highlighted in yellow.
When you’re finished customizing your sounds, you can save them in the Sound Scheme section. You’ll see Windows Default (modified) appear. Click Save As, and enter a name to save your custom sound scheme.
If you want to restore the default sounds, simply select Windows Default in the Sound Scheme section.
To go back to the Themes menu, you can click the arrow at the top-left corner of your screen, as we’ve already seen.
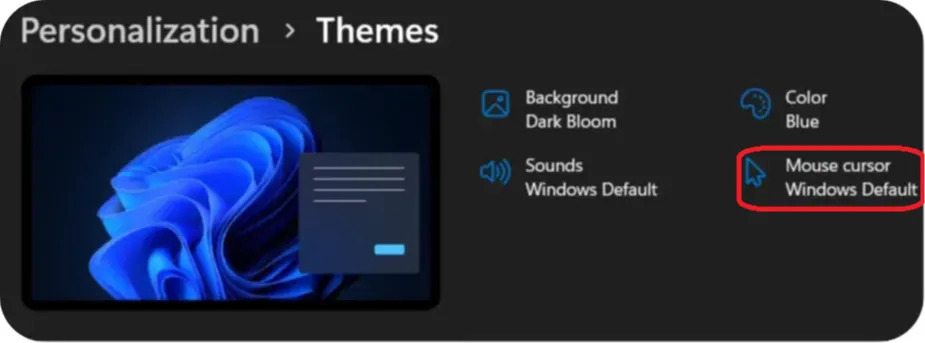
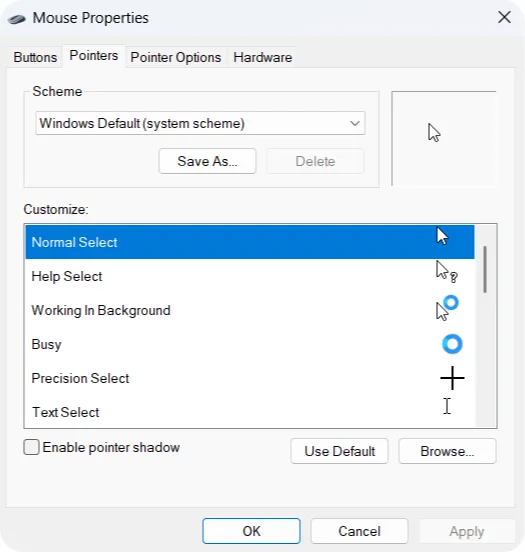
Step 5: Change the mouse pointer appearance
Under Personalization > Themes, We’re going to see how to change the the mouse pointer appearance. To do this, click on Mouse cursor.
Changing the mouse pointer appearance allows you to customize how the cursor looks on your screen.
You can change its size, color, or choose a different pointer style. This can make it easier to see, improve accessibility, or simply match your personal style.
In the Scheme section, select the mouse pointer style you want from the dropdown menu.
In the Customize section, you’ll see a preview of how your selection looks.
Once you’ve made your selection, click Apply.
To go back to the Themes menu, you can click the arrow at the top-left corner of your screen, as we’ve already seen.
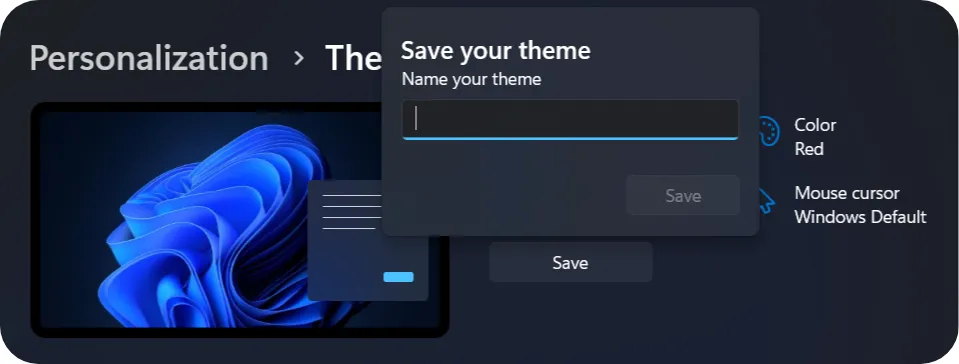
Step 6: Save your new Themes
Under Personalization > Themes, you can save your new theme by clicking Save.
Give it a name, and it will be added to the list of available themes.
Due to a bug, the Save button may sometimes not appear.
If this happens, try switching to another theme and then back to your customized onem this can sometimes make the Save button reappear.
If that doesn’t work, just do what we always do when there’s a Windows bugm restart your computer.
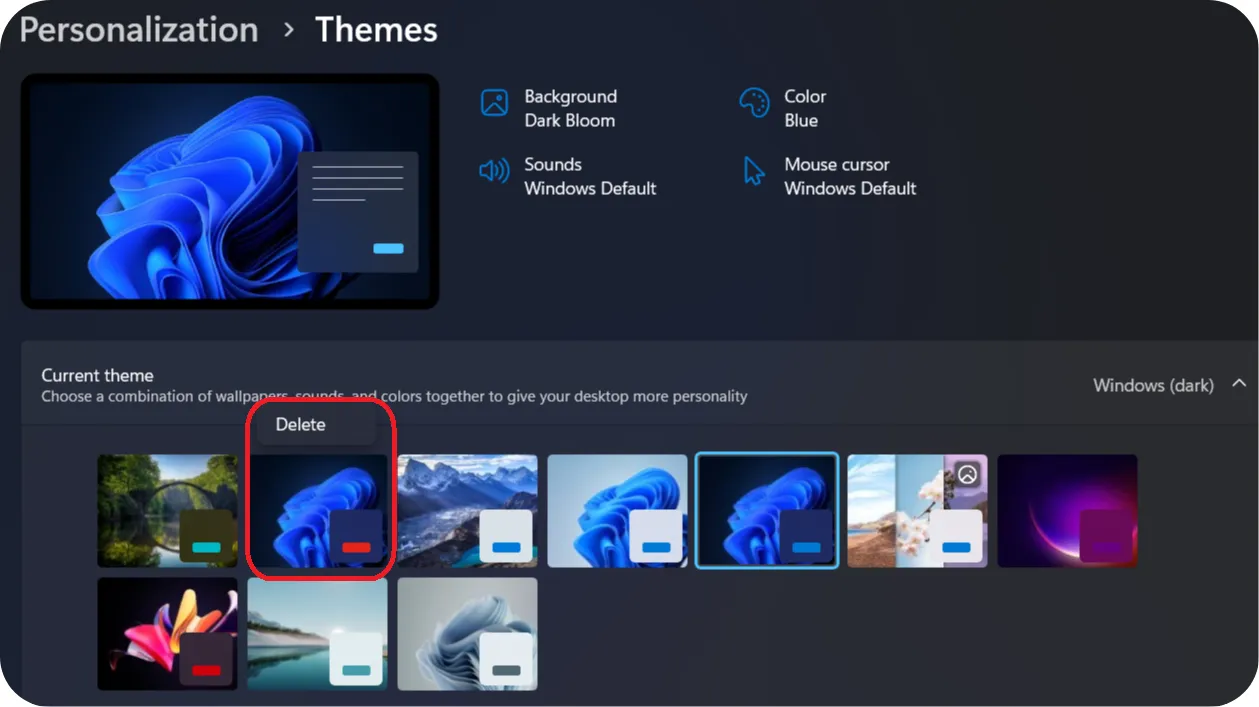
Step 7: Delete an Unused Theme
If your list of themes is getting cluttered or includes ones you no longer use, it might be a good idea to delete them.
In Personalization > Themes, you can only delete a theme if it is not currently selected.
If the theme is active, the delete option will not be available.
To delete a theme, right-click on it and select Delete.
The theme will then be permanently removed.
🎉 Congratulations!
You’ve reached the end of this tutorial on customizing themes in Windows.
You now know how to change your desktop appearance, adjust colors, sounds, and the mouse cursor.
Take some time to explore and create an environment that reflects your style, after all, you’re the one spending time in front of this screen!