How to share Wi-Fi from Iphone to PC
No Wi-Fi for your computer? If you have an Android smartphone, you’re in luck!
There’s a simple solution: you can share Wi-Fi from iPhone to PC using your phone’s hotspot feature. This method is called tethering or mobile hotspot. It’s perfect when you’re on the go, facing a Wi-Fi outage, or even during a power cut, as long as your iPhone and computer are charged.
💡 Note: Your computer needs Wi-Fi to get online. Laptops usually have built-in Wi-Fi, but not all desktop computers do.
If you’re using a desktop, make sure it supports Wi-Fi.
⚠️Be careful: when you connect your computer to your mobile Wi-Fi, it uses your mobile plan’s data. So make sure you still have enough data left. If you want to use less data, try not to download big files, watch videos, or play online games.
Additionally, not all iPad have the capability to share a Wi-Fi connection, as this feature depends on the specific hardware and software of the device.
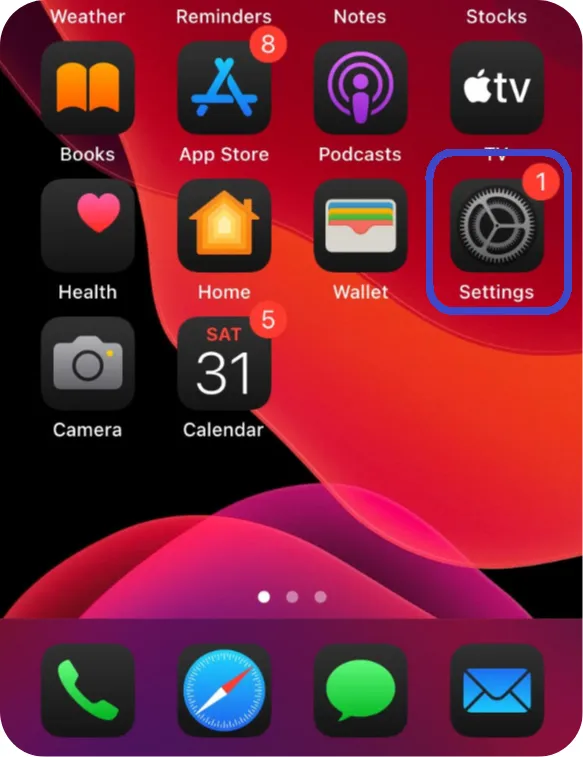
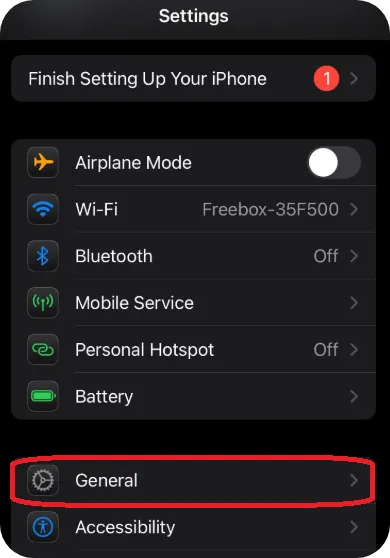
Step 1: Open Settings on Your iPhone
Unlock your iPhone and go to the Settings app.
You can usually find it on your home screen or by swiping down and tapping the gear icon.
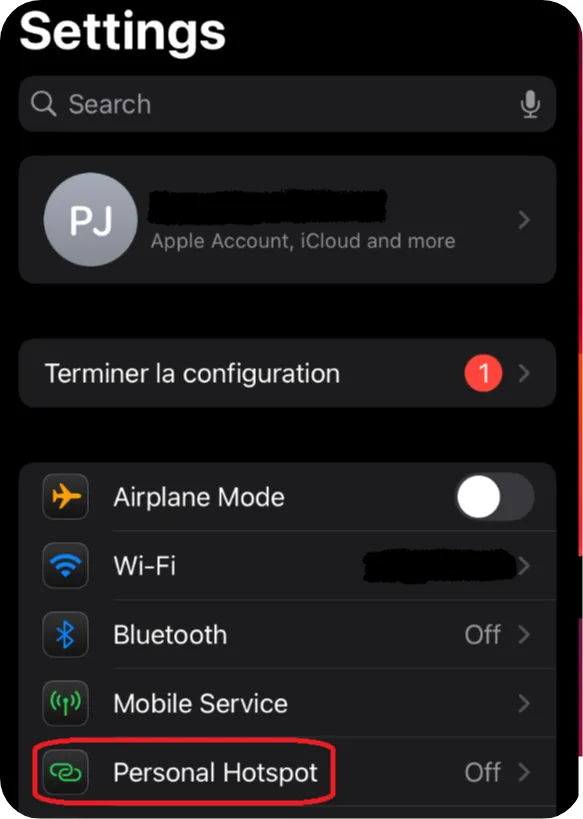
Step 2: Tap on Personal Hotspot
In the Settings menu, scroll down (move your finger up on the screen to see more options) a little and tap on Personal Hotspot.
If you don’t see it immediately, you may need to tap Cellular first, then select Personal Hotspot.
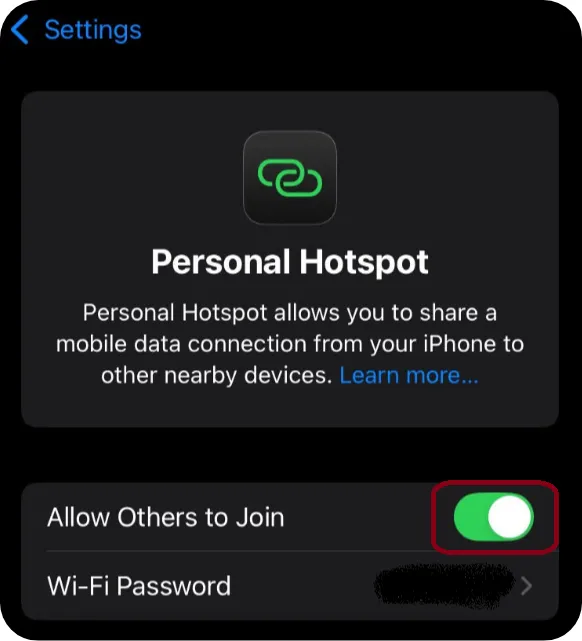
Step 3: Turn On Allow Others to Join
You’ll see a switch next to Allow Others to Join, tap it to turn it on (it will turn green).
This activates your iPhone’s hotspot and makes it visible to other devices.
💡Tip: To go back to the main Settings menu, just tap Settings in blue at the top left of your screen.
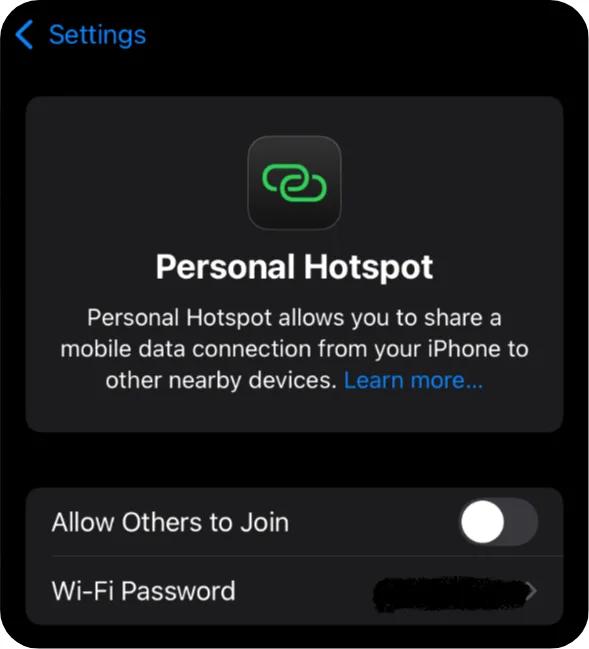
Step 4: Check the Wi-Fi Password (if needed)
Just below the switch, you’ll see your Wi-Fi password.
Tap Wi-Fi Password to open the password settings.
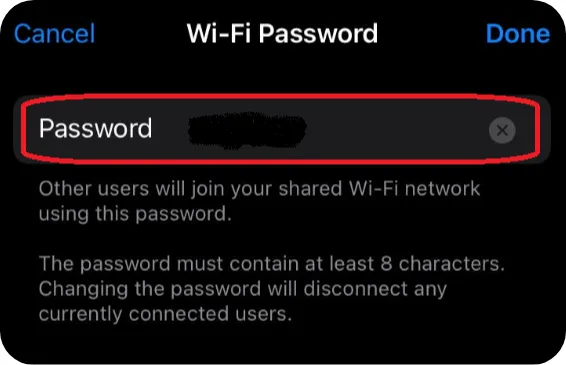
Then, tap again inside the text box to edit the password.
🔒 Choose a secure password:
– Avoid simple passwords like 12345678 or password.
– Use a mix of letters, numbers, and symbols (e.g., iPhone2025!).
👉 This is the password you’ll enter on your PC (or any other device) when connecting to your iPhone’s hotspot.
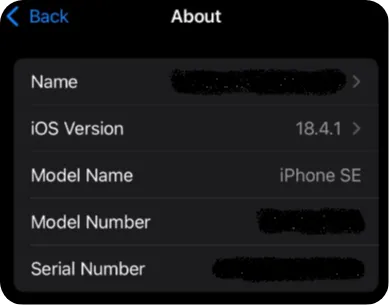
Step 5: Note Your iPhone’s Hotspot Name
When you connect from your PC, your iPhone will appear in the list of Wi-Fi networks using its device name. If you haven’t changed anything, the default network name will be something like:
[Your Apple ID name]’s iPhone
for example:
Emma’s iPhone
This is the name your computer will look for when scanning nearby networks.
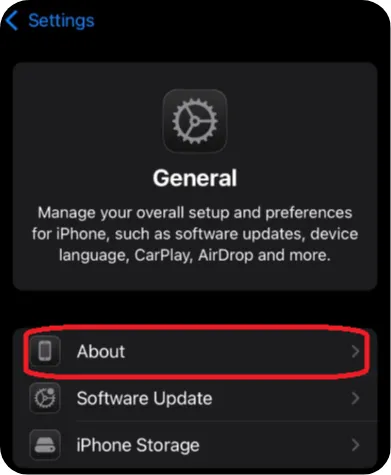
You can check or change this name in:
Settings > General > About > Name
Just tap Name to edit it.
Step 6: Let’s Connect Your Computer to the Shared Wi-Fi
You’ve completed the iPhone setup. Great job!
Now let’s connect your computer to the network you just created.
To do that, check out the tutorial: How to Connect to a Wi-Fi Network (wireless Internet).
Step 7: Turn Off the Hotspot When You’re Done
When you no longer need to share your iPhone’s internet connection, it’s best to turn off the hotspot to save battery and mobile data.
Here’s how:
- Open the Settings app
- Tap on Personal Hotspot
- Toggle “Allow Others to Join” to off
🟢 When the switch is green, your hotspot is active.
⚪️ When it’s gray, it’s turned off.
Step 8: Easily Share Your Connection Again Next Time
Next time you want to share your internet connection, it’s quick and easy:
- Open the Settings app on your iPhone
- Tap Personal Hotspot
- Turn Allow Others to Join back on
Your previously used network name and password will still be there, no need to reconfigure anything!
Conclusion
Using your iPhone as a Wi-Fi hotspot is a simple and practical solution when you don’t have access to regular Wi-Fi, whether you’re traveling, facing an outage, or just need a quick connection.
But don’t forget:
- Make sure your phone is charged, as hotspot use drains battery quickly.
- Watch your data usage, streaming videos or downloading large files can use up your plan fast.
Still, it’s a great backup option to stay connected anytime, anywhere!