How to Change Your Account Name and Picture in Windows 11
How to Change Your Account Name and Picture in Windows 11 is a simple way to make your computer more personal and better organized.
Personalizing your account helps you easily recognize each session, especially when the computer is shared with others. Everyone can have their own space with their name, photo, and settings, making the experience clearer and more enjoyable for everyone.
In this tutorial, we’ll first look at how to change your account name, then how to update your profile picture.
💡 Tip: You can jump directly to the section you want by clicking on it.
Change the account name
If you followed the tutorial How to Managing User Accounts on Windows 11, you already know how to do this.
Changing the account name makes it easier to recognize who the account belongs to.
Step 1: Run dialog box
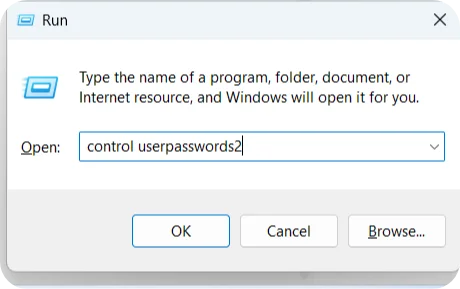
To open the Run dialog box, press the Windows key and the R key at the same time (🪟 + R).
Then, type control userpassword2 into the box and press Enter.
⚠️ Be careful: if you click outside of this dialog box with your mouse, it will close. If that happens, you’ll need to reopen it using the Windows + R shortcut again.
Step 2: User Accounts
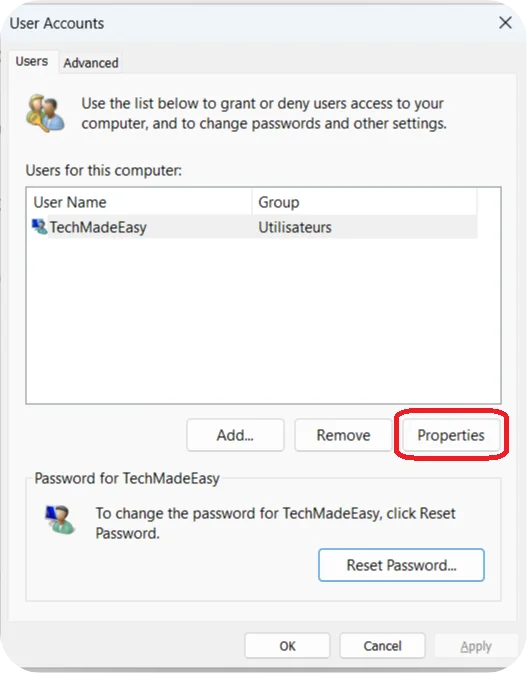
On this User Accounts page, we will be able to manage several settings.
Here, we are going to click on Properties
This option allows you to set a new password for the selected user account.
Step 3: change the settings
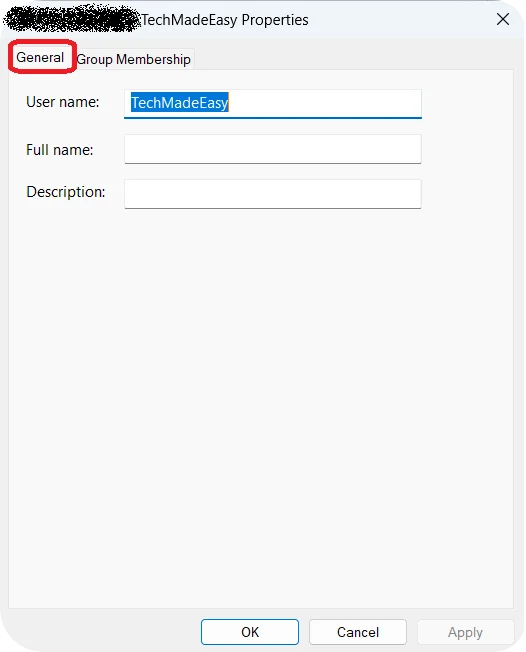
In the General tab, you can change your account name.
If you have a Microsoft account, this does not change the actual name of your Microsoft account. It only changes the name you see on your PC.
⚠️ Be careful, When you do this, I advise you to restart your PC.
Change the account picture
In this tutorial, you’ll learn how to set or change your profile picture in Windows. Whether you want to add a personal touch with a photo or select an image you like, we’ll guide you step by step.
Note: In the screenshots, I’m using the Windows dark theme. If you like how it looks, you can check out the tutorial How to Customize Your Windows Account. In the Explore Themes section, I’ll show you how to apply it to your PC.
Step 1: Open Settings
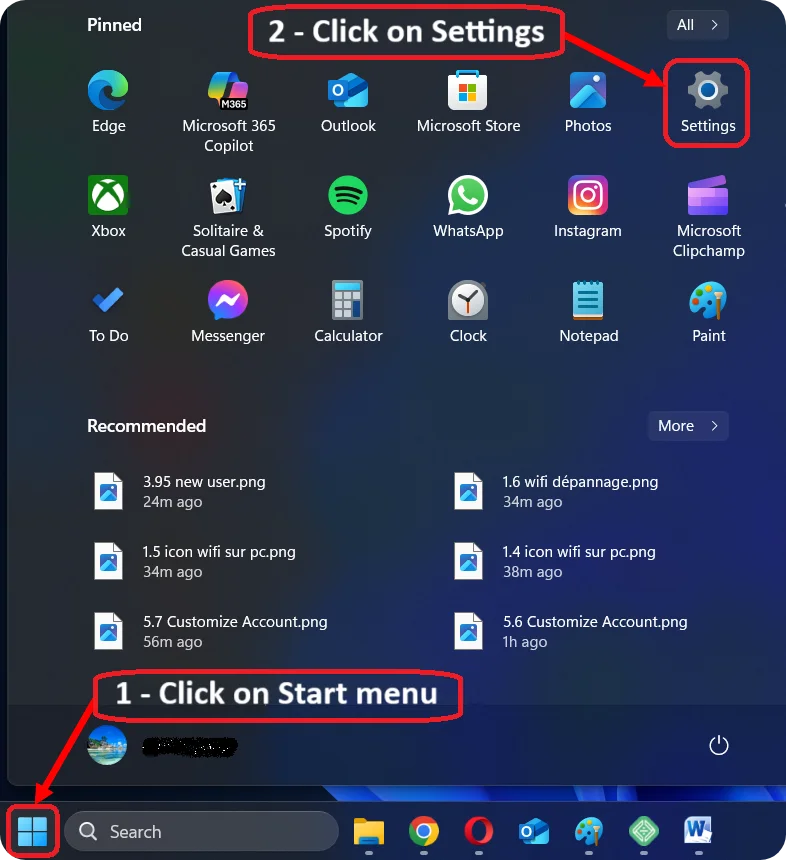
1 – Start by clicking on the Start menu, which is represented by The Windows logo located at the bottom of the Taskbar.
2 – Once the Start menu is open, click on the gear icon to access Settings.
💡 Tip: You can also open the Settings by using the shortcut Windows + I. You need to press the Windows key and, without releasing it, press the I key.
Here’s what the Windows key looks like: 🪟
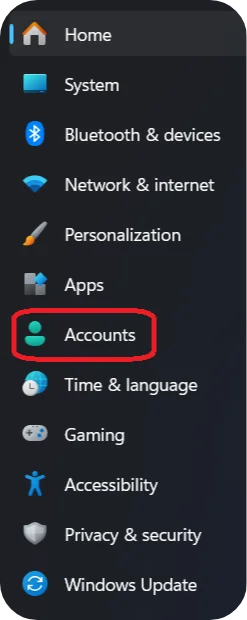
Step 2: Open Accounts
Once you have opened the Settings, you need to click on Accounts to proceed with creating our new user.
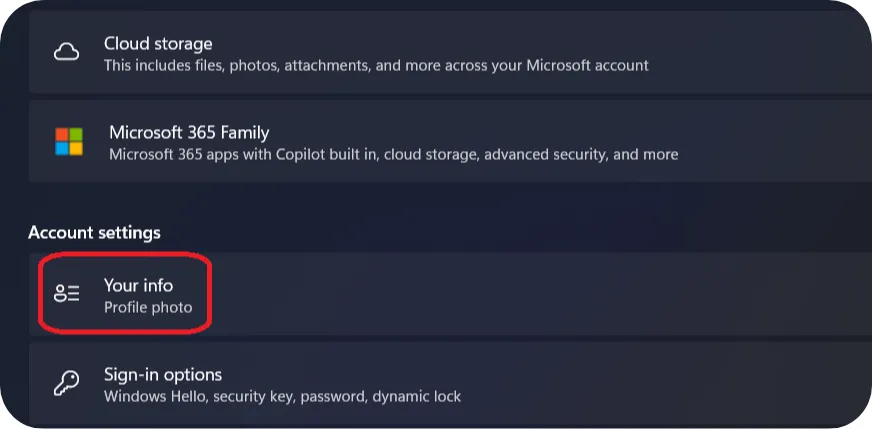
Step 3: Your info
You are now on the Accounts page. To find Your info, You need to scroll down in the Account Settings section.
Scrolling means moving the content of the page up or down using your mouse’s scroll wheel or by dragging the scroll bar on the side of the window.
click on Your info.
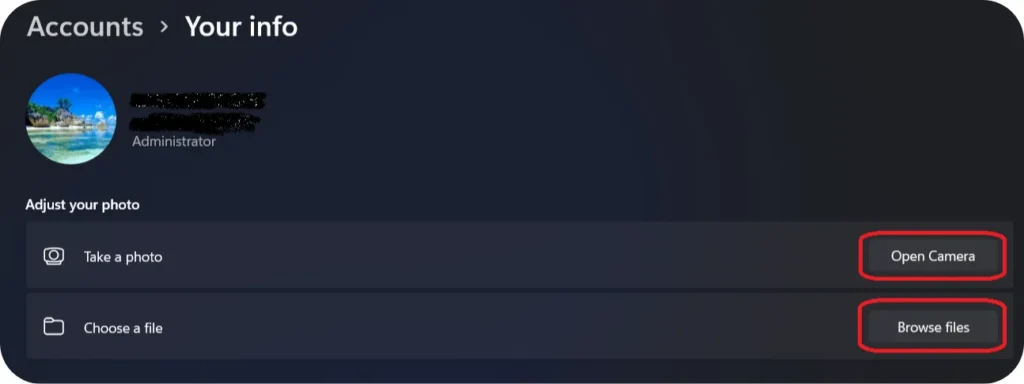
Step 4: Choose your photo or image
You have two options to Take a Profile Picture :
– Take a photo
– Choose a file
Step 5.a: Choose your photo
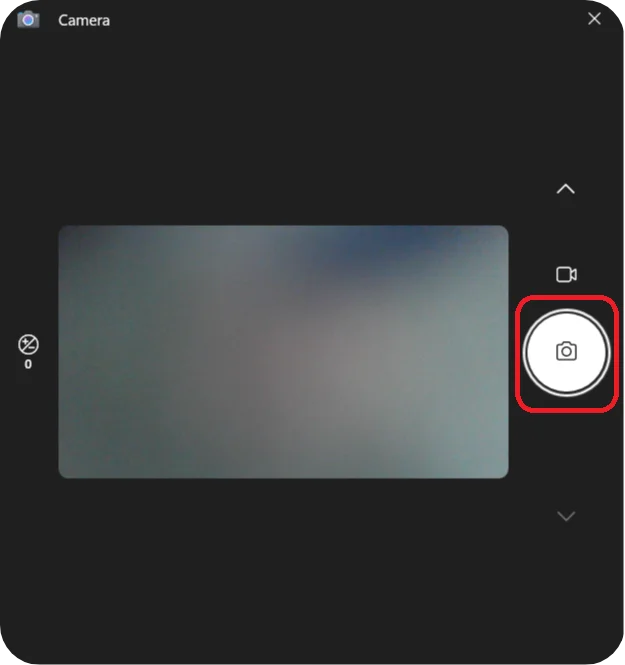
You can take a selfie or use your computer’s camera to take a photo of something else to use as your account picture. To do this, simply click on Open Camera.
You may receive a message from Windows asking for access to your location. You can choose to accept or refuse; it is not blocking.A camera tool will open.
To take your profile picture, click on the camera icon to turn it on — as shown in the screenshot.
You can take the photo by clicking on the camera button.
If you’re happy with the result, click ✓ Accept.
If not, click Retake to try again.
Once Once accepted, the picture will automatically be set as your profile picture. Congratulation!
Step 5.b: Choose your picture
– Choose a file:
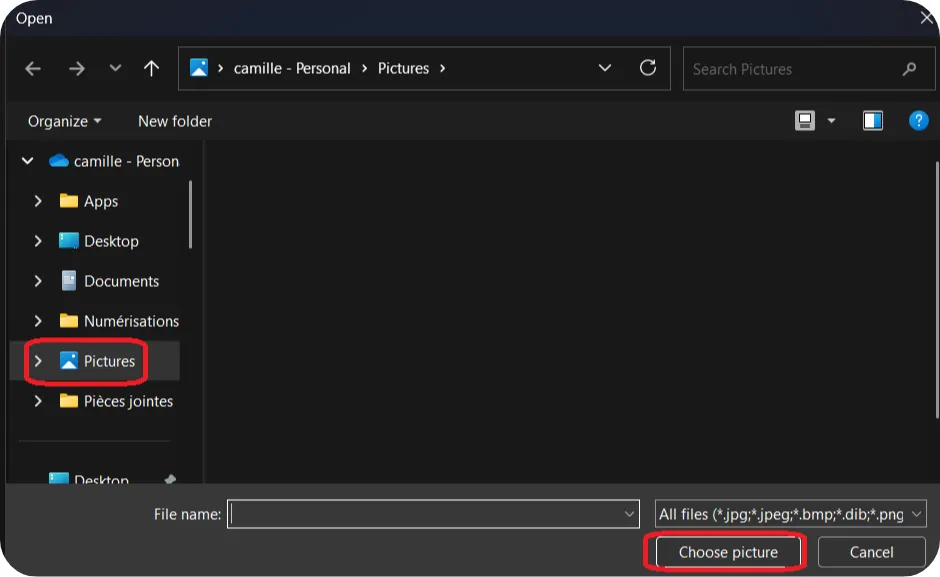
You can choose a photo or image already saved on your computer to use as your profile picture. To do this, click on Browse files.
Photos and images are usually stored in the Pictures folder on your computer. If that’s not the case for you, you’ll need to navigate through the File Explorer window (see screenshot) to the folder where your photo or image is saved.
Once you’ve made your selection, click once on your picture, then confirm by clicking Choose picture.
Congratulations! Your picture is now set as your profile picture.