How to Managing User Accounts on Windows 11
Managing user accounts is an important part of using Windows 11, especially if you share your computer with others or want to keep different workspaces separate. If you need information about creating a Windows account, you can refer to the tutorial How to Create a new User Account on Windows 11.
In this tutorial, you’ll learn how to :
– switch between user accounts
– remove an account
– modify the settings of an existing account, such as its name or account type.
These skills will help you organize your computer more effectively and customize each user’s experience.
💡 Tip: You can jump directly to the section you want by clicking on it.
Switching Between User Accounts
Step 1: signing out
Let’s start by signing out :
- right-click on the Start menu.
- Click on Shut down or sign out.
- To sign out of your current account, simply click on Sign Out.

Step 2: log in to an account
To connect to your new account, after logging out, press any key to reach the Windows 11 login screen.
At the bottom left, you will find the accounts that exist on your computer. Select the account you wish to log into. Click on your account, then enter the password you chose. Windows will log you in automatically.
During this first login, it may take a few seconds as Windows sets up your user session.
You are now logged in with your new user.

Removing a User Account
Removing unused or unnecessary accounts can help keep your system organized, reduce confusion, and free up disk space.
Disk space on a PC is valuable — sometimes it’s a good idea to delete an unused user account to reclaim storage.
⚠️ Warning: This will delete all files and data stored in that user’s profile. Make sure you back up anything important before deleting.
💡 Tip: If you still run out of space on your PC, you can refer to the How to Get Started with Cloud Storage tutorial.
Let’s now see how to proceed to delete a user account.
Step 1: Open Settings
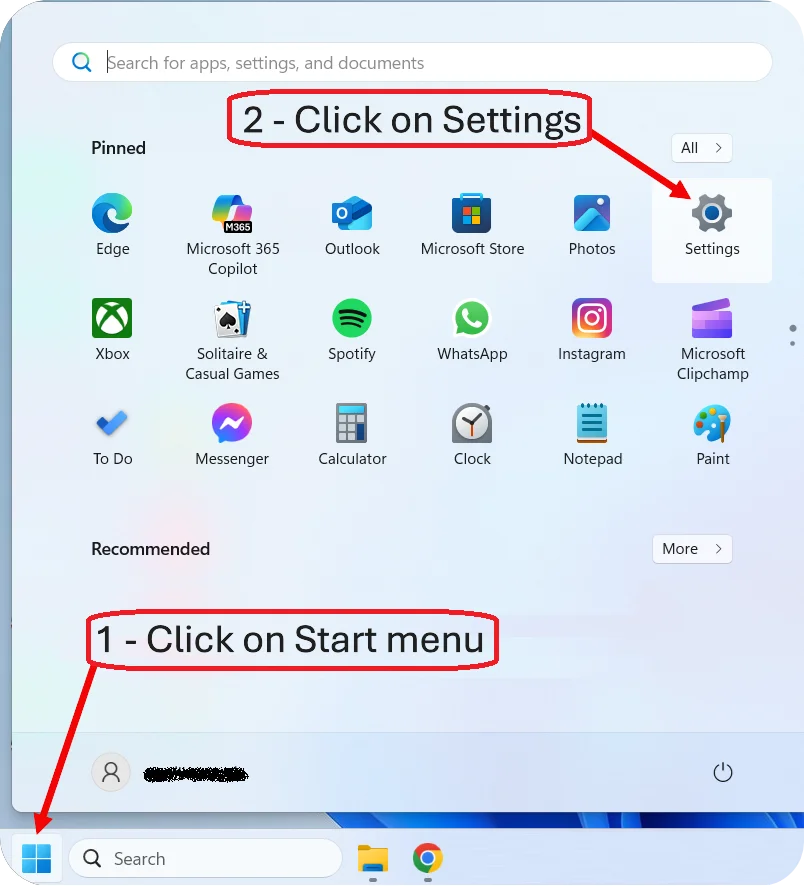
1 – Start by clicking on the Start menu, which is represented by The Windows logo located at the bottom of the Taskbar.
2 – Once the Start menu is open, click on the gear icon to access Settings.
💡 Tip: You can also open the Settings by using the shortcut Windows + I. You need to press the Windows key and, without releasing it, press the I key.
Here’s what the Windows key looks like: 🪟
Step 2: Open Accounts
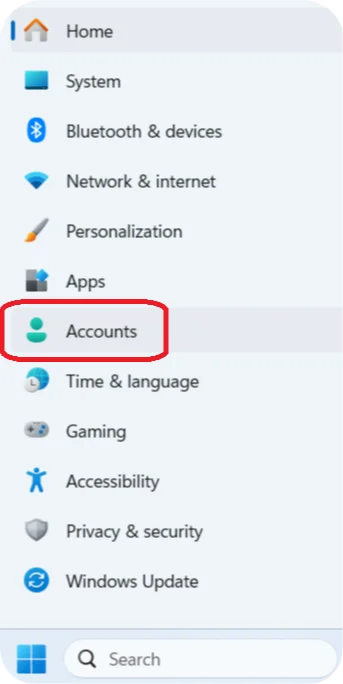
Once you have opened the Settings, you need to click on Accounts to proceed with creating our new user.
Step 3: Other users
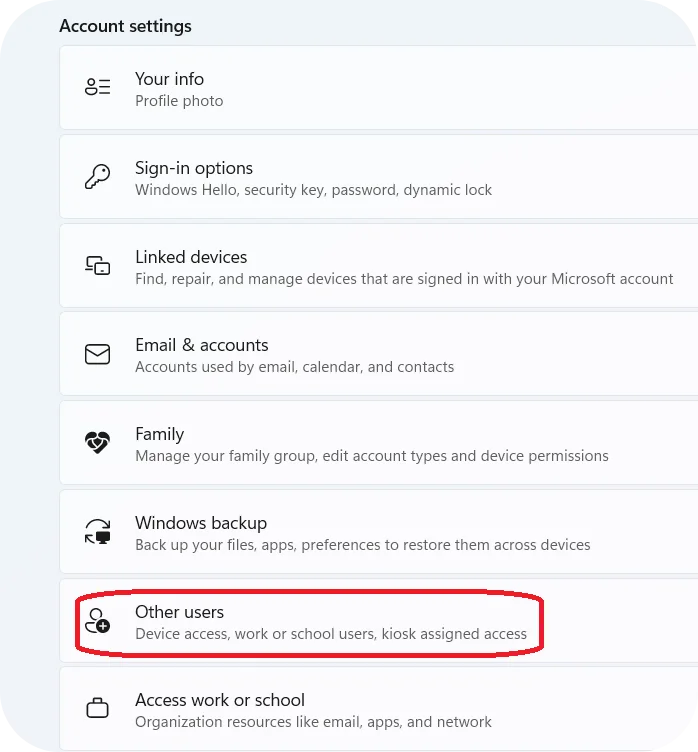
You are now on the Accounts page. Scroll down in the Settings window until you reach the Other users section.
Scrolling means moving the content of the page up or down using your mouse’s scroll wheel or by dragging the scroll bar on the side of the window.
Keep scrolling until you see the Other users section, then click on it.
Step 4: delete the user account
We are going to select the account we need to delete. Here, I clicked on the TechMadeEasy account. We then have the option to delete the user account by clicking on Remove.
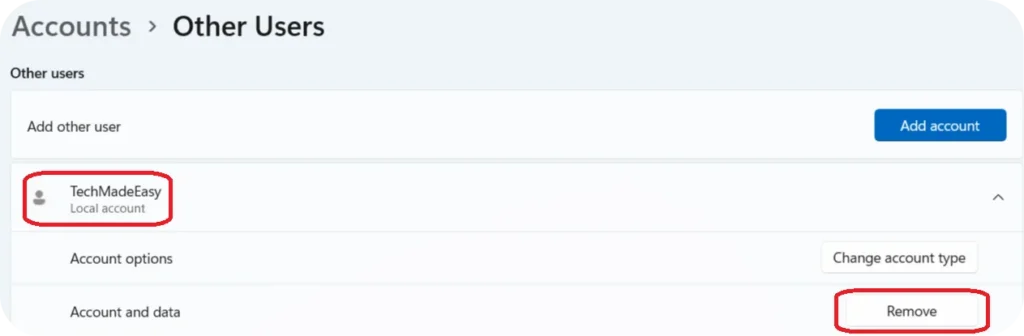
Note: A Windows computer must always have at least one user account; the last remaining account cannot be deleted.
Modifying an Existing Account (Name, Type, etc.)
Changing the account name makes it easier to recognize who the account belongs to.
Changing the account type (Standard or Administrator) allows you to control what the user can do on the computer.
Each type of account has its own advantages and disadvantages.
- Administrator accounts have full control over the system. They can install software, change system settings, and manage other user accounts. However, using an administrator account all the time can be risky because it makes the system more vulnerable to malware or accidental changes.
- Standard accounts are more limited. They can use most software and change some settings, but they can’t install or remove programs or make major system changes. This makes them safer for daily use, especially for beginners or children.
It is important to choose whether our account will be Standard or Administrator. Clearly understanding what this means will help us make the right choice.
If you’re not sure which type to choose, it’s safer to use a Standard account. This will help prevent mistakes.
When you try to do something risky, a message will appear telling you that you need to be an Administrator to perform that action.
once you feel more comfortable, you can switch back to an Administrator account.

Now that you have more information, we can take a look at how to change the settings of a user account.
⚠️ To perform these actions, your account must be an Administrator.
The first account created on your PC is always an Administrator account. You can therefore use that account to perform these actions.
We will now see how to access the page where you can change the account type, its name, and its password.
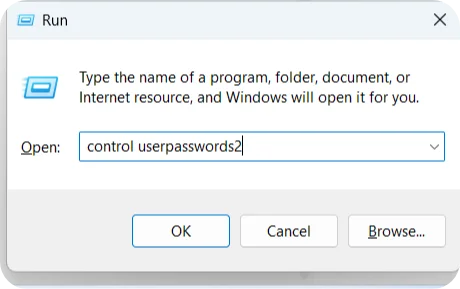
Step 1: Run dialog box
To open the Run dialog box, press the Windows key and the R key at the same time (🪟 + R).
Then, type control userpasswords2 into the box and press Enter.
⚠️ Be careful: if you click outside of this dialog box with your mouse, it will close. If that happens, you’ll need to reopen it using the Windows + R shortcut again.
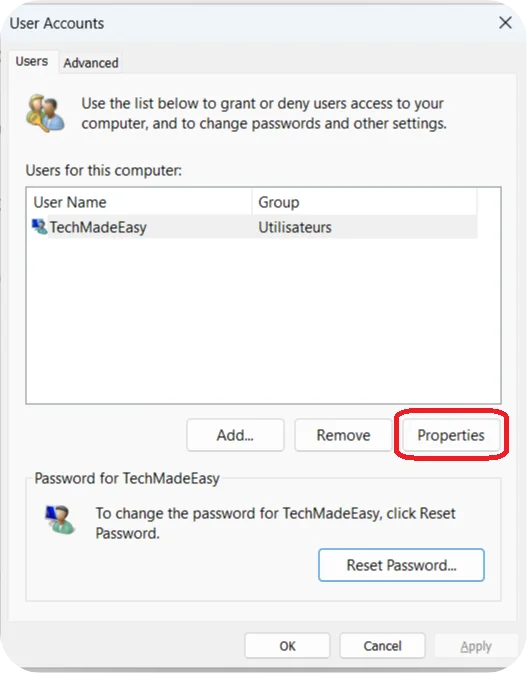
Step 2: User Accounts
On this User Accounts page, we will be able to manage several settings.
Here, we are going to click on Properties
This option allows you to set a new password for the selected user account.
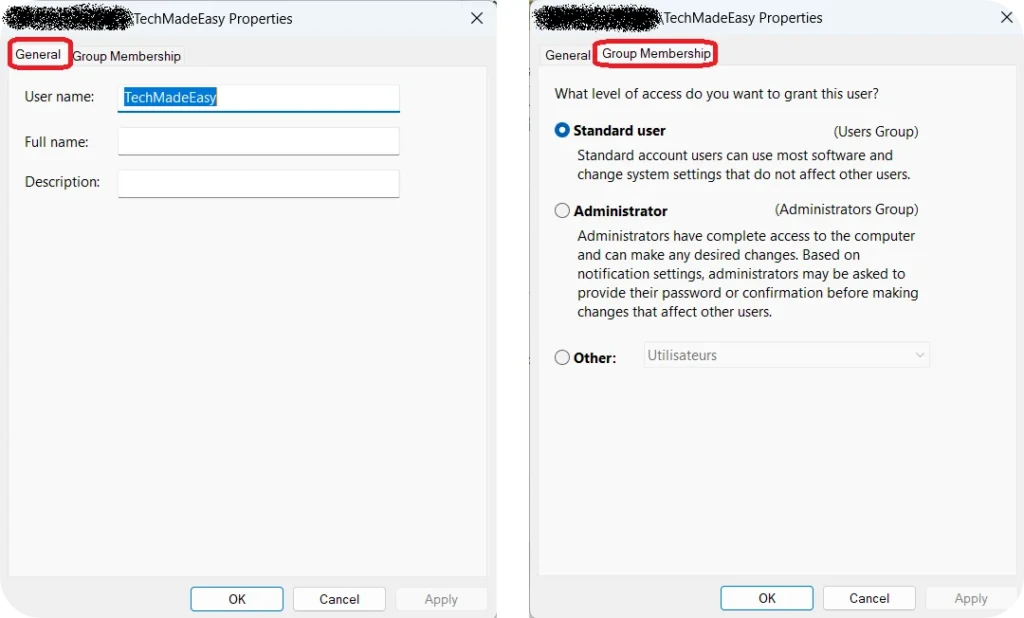
Step 3: change the settings
In the General tab, you can change your account name.
If you have a Microsoft account, this does not change the actual name of your Microsoft account. It only changes the name you see on your PC
In the Group Membership tab, you can choose whether your account will be an administrator or a standard user.
⚠️ Be careful, When you perform either of these two operations, I advise you to restart your PC.
Managing user accounts in Windows 11 gives you better control over your computer, especially when it is shared by multiple users. By learning how to switch between accounts, remove unnecessary ones, and adjust account settings like name or permissions, you can ensure a more organized, secure, and personalized experience.
Now that you know how to create an account and assign permissions, you can customize it to suit your preferences. To do that, check out the tutorial: How to Change Your Account Name and Picture.