How to Remove an App
Learning how to remove an app is an essential skill for any iPhone or iPad user, especially if you’re looking to free up storage, reduce clutter, or delete apps you no longer use. Whether it’s a game you’ve stopped playing or an app you installed by mistake, removing it only takes a few taps. In this tutorial, we’ll guide you step by step to help you delete apps safely and confidently from your iPhone or iPad.
💡 Tip: Before deleting an app because it’s not working properly, try updating it first. An update might fix bugs or add new features. You can learn how to do that in our guide: How to Update an App on iPhone.
Step 1: Find the App You Want to Remove
Locate the app you wish to delete directly on your Home Screen. You might need to swipe left or right to find it if it’s not on the first page.
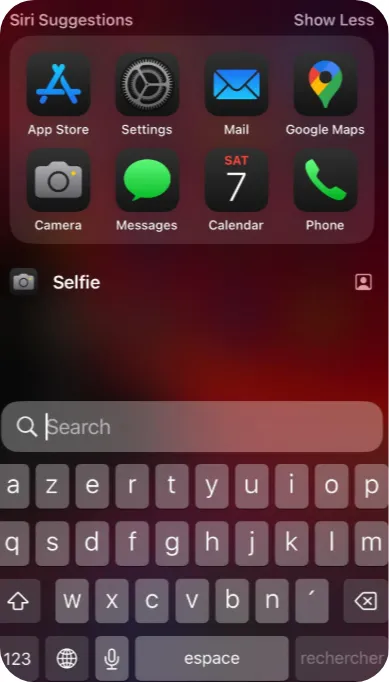
You can also use the Search bar (see the screenshot). Just swipe down from the middle of the Home Screen, then type the app’s name.
Step 2: Delete the App from Your Home Screen
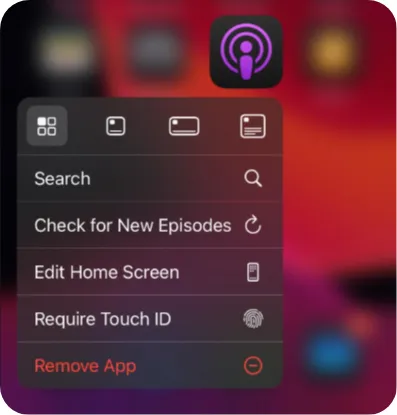
We’ve now found the app we want to delete. Touch and hold its icon until a menu appears.
Tap Remove App in the menu.
You’ll then see two options:
– Remove from Home Screen: This hides the app from the Home Screen but keeps it in the App Library. Choose this if you want to clean up your screen without deleting the app.
– Delete App: This completely removes the app and its data from your device.
If you tap Delete App, a confirmation message will appear:
“Deleting this app will also delete its data.”
Tap Delete again to confirm.
You’re Done!
Now you know how to remove apps from your iPhone, whether you want to clear up space or simply clean up your Home Screen.